GitHub Apps Authentication
Use GitHub Apps for Authentication
The preferred method of integration, as suggested by GitHub Documentation, is the utilization of GitHub Apps over OAuth Applications. Outstatic has built-in support to seamlessly integrate with Github Apps.
Follow the steps below to create a new GitHub App:
1. Register a New Application
First go to the "Register a new GitHub App" page on GitHub by clicking here.
2. Name Your Application
Enter a name for your application, such as "Outstatic Blog".
3. Set Homepage URL
Enter any valid URL as the Homepage URL. This can be updated later to your actual website URL.
4. Configure Callback URL
Set the Callback URL to https://my-website-name.com/api/outstatic/callback. For local development, you can use http://localhost:3000/api/outstatic/callback.
Optional: You can set multiple callbacks in case you want to use the same GitHub App for different environments (ex: production vs local development). You will need to set the OST_GITHUB_CALLBACK_URL environment variable to the corresponding callback url on the environment.
5. Disable Webhooks
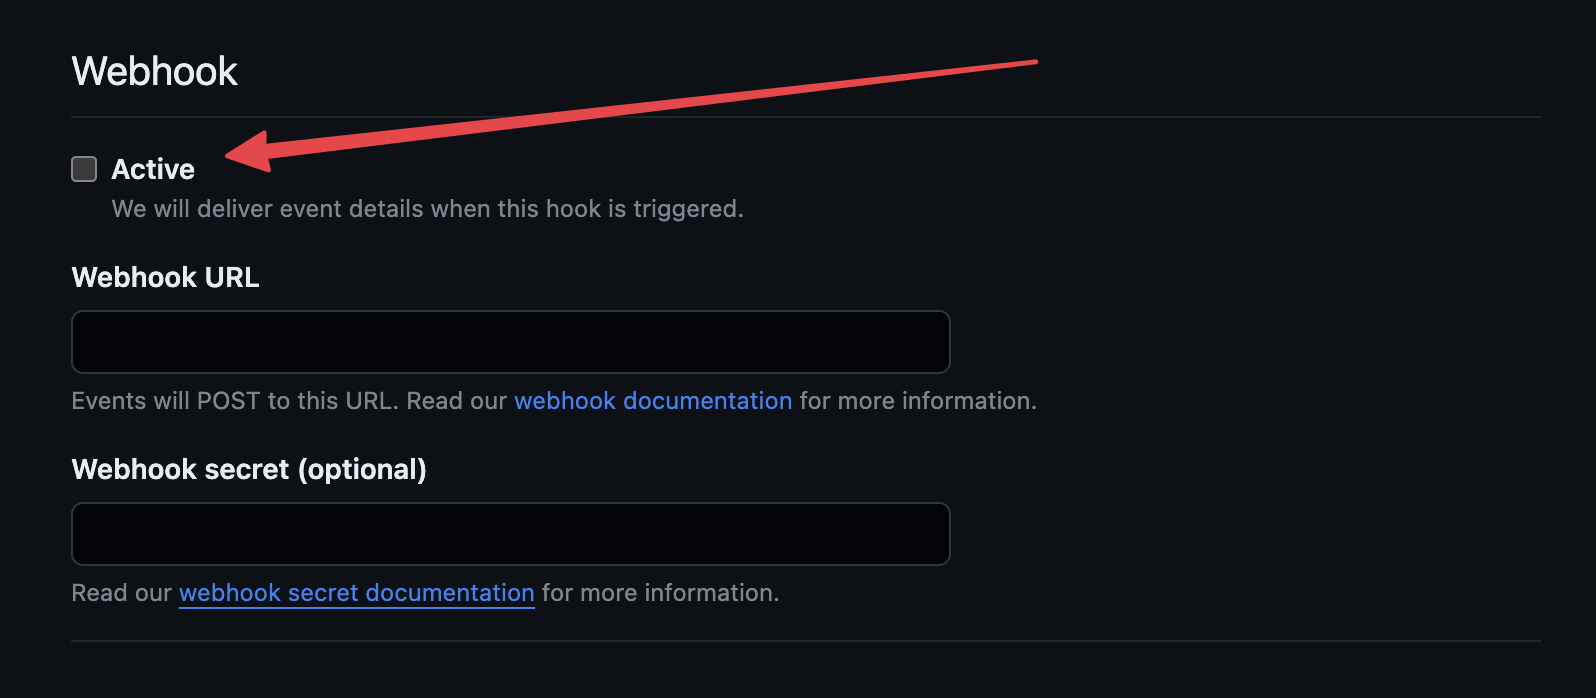
Unselect the "Active" option on the Webhook section.

6. Set Permissions
Outstatic requires read and write access to specific repositories. Navigate to "Repository permissions" > "Contents" and enable "Read and write". No other permissions are needed.
7. Select Account Scope
In the last section, select "Only on this account" if you are creating a repository on your personal account. For creating on other accounts, choose "Any account".
8. Create GitHub App
Click "Create GitHub App". You will be redirected to your application settings.
9. Retrieve Client ID & Generate Client Secret
Copy the Client ID from your application settings and generate a Client Secret by selecting "Generate a new client secret". These will be used for OST_GITHUB_ID and OST_GITHUB_SECRET respectively.
10. Install the Application
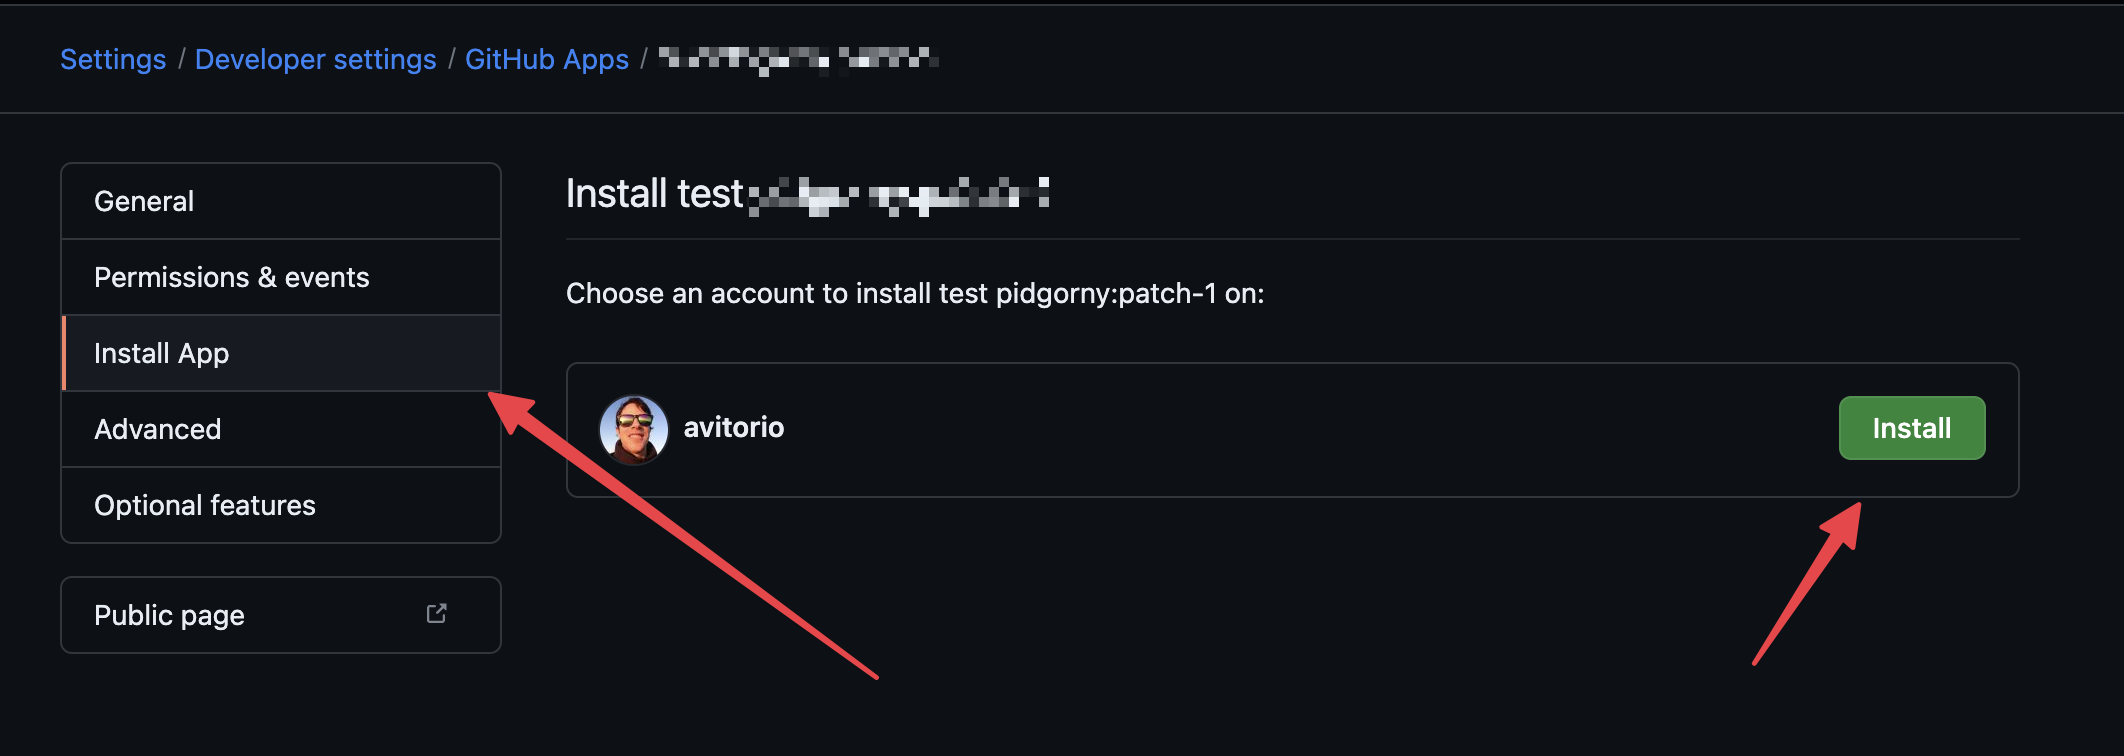
Go to "Install App" in your application settings and click "Install" for the account/organization where you want to add the repository.

11. Set Repository Permissions
Although providing permission to all repositories is possible, it is recommended to choose "Only select repositories" and add your desired repository. This permission can be modified later in the account/organization settings.
Then you only need to follow the Getting Started Guide to configure your application with the GitHub Apps Client ID and Client Secret values.